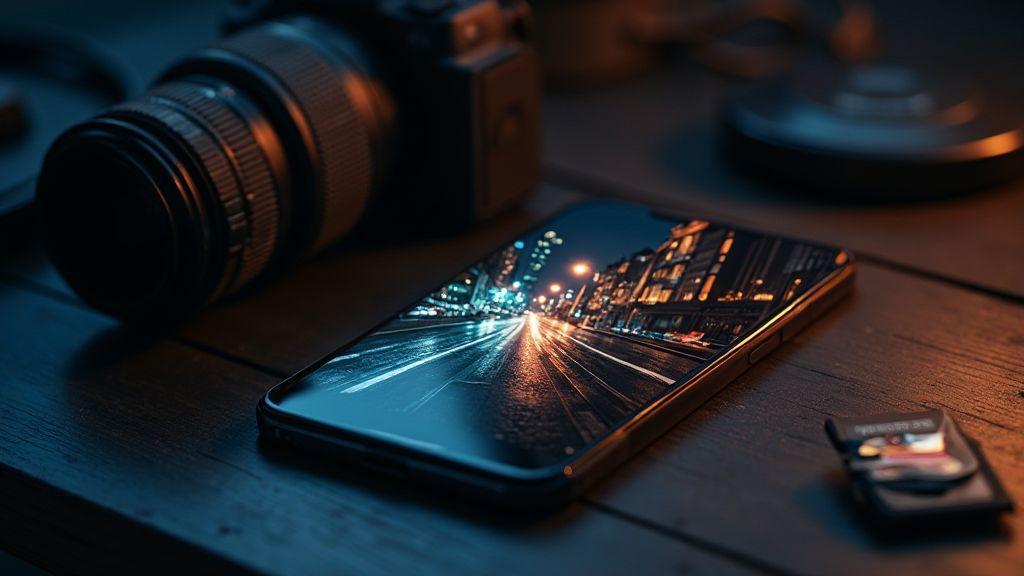
How to Edit Night Photos in Snapseed Step by Step Using Advanced Tools
You’ll learn a repeatable workflow to turn dark, noisy night shots into clean, vibrant images. This guide uses Snapseed’s advanced tools to pull detail from shadows, reduce noise, and balance color while preserving the scene’s mood. Small tweaks add up to big changes, so you’ll edit night photos with confidence.
Overview and plan
Begin with a plan: decide what the night photo needs most—brightness, color, noise, or sharpness—and move through each tool with purpose. The aim is a natural result that reflects what you saw, not an overprocessed look.
Snapseed step-by-step workflow overview
Open the photo and grab the obvious adjustments first—exposure, contrast, and saturation—then move to advanced tools. Lift shadows without blowing highlights, sharpen edges just enough to make stars and lights pop, and keep color balance natural. If skin tones appear, verify with a quick WB tweak. Finish with a gentle structure to unify the scene. Practice makes leaner edits and better outcomes.
Quick tool list
- Tune Image: exposure, contrast, highlights, shadows, brightness, warmth, saturation
- Details: structure and sharpening
- Noise Reduction: reduce grain without losing edges
- White Balance: color temperature and tint
- Brush/Selective edits: local adjustments on specific areas
- Curves/Other advanced tools: use cautiously for precision
Work with RAW files in Snapseed
RAW files provide the most detail for night edits. Open RAW to access powerful edits without losing data, recover highlights, lift shadows, and refine color with minimal banding. If you shot RAWJPEG, start with RAW and refine with JPEG for quick sharing.
RAW editing basics
Begin with exposure to recover sky and foreground detail, then adjust White Balance for natural skin tones and true whites. Use the Basics panel to balance contrast, brightness, and saturation. For noise, texture, and detail, apply Noise Reduction and Structure carefully to preserve texture in buildings and stars.
Importing DNG for more detail
DNG offers more latitude to recover dark and bright areas. Edit using exposure, white balance, noise, and detail, then compare with JPEG exports. The extra information helps maintain natural colors and texture in a night scene.
RAW export tips
Export at high quality; TIFF or PNG for lossless edits, and high-quality JPEG for online sharing. Keep a master edit in a non-destructive format and label exports clearly to preserve detail.
Reduce noise and sharpen for low light
Night shots benefit from a light touch: avoid over-boosting contrast or clarity, which can amplify grain. Target noisy areas first, protect textures with selective sharpening, and test by zooming in to ensure sharp edges without halos.
Snapseed noise reduction methods
- Method 1: Light noise reduction with a gentle sharpening pass to recover edge detail.
- Method 2: Use selective edits to mask noise in skies or flat areas while keeping subject textures sharp.
- Method 3: Compare before/after to avoid halos; back off if edges glow unnaturally.
Balance Details sharpening with denoise
Denoise first in the darkest areas, then sharpen important features like edges and lights. Use masking to protect smooth areas such as skin or skies. If it looks too clinical, soften sharpening slightly and recheck mood.
Noise removal checklist
- Target darkest areas first with gentle denoise
- Keep sharpening light and edge-focused
- Use selective edits for faces, textures, and skies
- Watch for halos around bright lights
- Compare with the original after major steps
- Save multiple versions with different balance
Use Curves and Tone to set mood
Curves and Tone let you push shadows and highlights without losing the night mood. Gentle curves deepen blues and warm the glow of lights. Pair Curves with Tone to keep the scene legible and natural.
Snapseed curves and tone adjustments night steps
- Start with Curves to lift detail in the shadows and preserve glow in highlights
- Use Tone to adjust warmth or coolness for the scene
- Compare before/after and back off if edits feel obvious
Tune Image for exposure, contrast, and warmth
Tweak exposure to reveal details in shadows without washing highlights, then adjust contrast to add depth. Fine-tune warmth to match the night’s mood. Check skin tones if people are present.
Tone adjustment steps
- Open Tone and adjust warmth as a baseline
- Tweak Saturation to keep colors believable
- Adjust Brightness in small steps
- Revisit Curves if needed for balance
Do selective edits for sky and lights
Selective edits let you enhance the sky and bright lights without disturbing the rest of the image. Boost color and clarity in the sky, recover details in bright spots, and lightly sharpen stars or lamps.
Snapseed selective editing night sky techniques
- Use Select to isolate sky; boost structure and saturation sparingly
- Add warmth to mimic city afterglow when appropriate
- Recover mid-tones in the sky while protecting foreground
Boost highlights and protect shadows selectively
Brighten specific areas (windows, lamps) and guard shadows to preserve depth. If clipping occurs, back off the brush or reduce exposure on that pass.
Selective layer tips
Create layers for sky, lights, and cleanup. Tweak one layer at a time, adjust masks to avoid halos, and label layers clearly for easy revisiting.
How to Edit Night Photos in Snapseed Step by Step Using Advanced Tools: recap
Follow a clean, repeatable workflow: crop, isolate sky and lights with Select, use Structure and Saturation on the sky, Highlights for bright spots, and Shadows to recover detail. Use Brush for precise sky edits and apply gentle Blur or Texture adjustments to soften halos. Always compare with the original to ensure edits serve the mood.
Heal and remove unwanted objects and glare
Glare and stray objects can ruin the mood. Identify distractions, then heal or patch with careful sampling to blend with the background. Compare edits to ensure a natural look and adjust lighting after removal to preserve atmosphere.
Snapseed healing and noise removal night photos uses
Use healing for small distractions, then apply noise removal to tame grain. Switch between healing and noise tools to preserve texture while cleaning the image. Compare before/after to confirm natural results.
Spot heal, patch, and fix small bright distractions
Spot heal tiny bright distractions, patch larger uniform areas, and adjust hotspots to maintain balance. Keep changes subtle and natural.
Healing workflow
Frame the edit in your head, heal small distractions first, then address noise. Compare with the original often, and finish by reviewing at actual size.
Apply HDR Scape and subtle filters
HDR Scape can enhance texture and lighting without turning the photo cartoonish. Use a subtle approach; back off if halos appear. Fine-tune with a soft filter and gentle warmth to keep a natural, cinematic look.
Snapseed HDR Scape night photography tutorial uses
HDR Scape reveals textures in brick, glass, and clouds while keeping overall mood intact. Use it sparingly and selectively to avoid an artificial glow.
Keep HDR natural to avoid halos
Halos around bright spots need careful radius and deghosting. Take breaks between tweaks and reset to a mild baseline if necessary. Balance structure, texture, and vibrance to maintain a cohesive look.
Quick low light photo editing tips
Plan first, then adjust exposure, color, and sharpness. Lift shadows, tame highlights, and keep skin tones natural. Watch for noise and sharpen selectively.
Snapseed low light photo editing tips checklist
- Tune Image for brightness, contrast, ambiance, warmth
- Details for texture
- White Balance to correct color casts
- HDR Scape for high-contrast nights, but keep it authentic
- Save versions for comparison
Fast fixes: exposure, contrast, and white balance
Edit in this order: exposure, then contrast, then white balance. If color looks off, tweak temperature and tint a little more. If you see noise, reduce it lightly while preserving edge clarity.
Low light checklist
- Check exposure and shadows
- Adjust contrast for depth
- Set natural white balance
- Monitor noise and sharpen selectively
- Save multiple versions
- Consider a light crop to reduce distractions
Quick editing workflow: sharing night photos
Aim for a clean, ready-to-share image with minimal editing. Global passes (exposure, contrast, WB) plus targeted local tweaks keep the mood. Resize for platforms and add a subtle watermark if desired.
Export, save looks, and share your edits
Export formats matter for night photos. High-quality JPEG for online sharing; TIFF or PNG for archiving. Save a master edit, then export final files with consistent color profiles to preserve glow and color shifts.
Advanced Snapseed night photo editing export choices
Choose export settings that balance sharpness and noise. Use color profiles (sRGB for broad compatibility). Review at multiple zoom levels to ensure shadows retain detail.
Save look, export size, and social sharing settings
Save looks to preserve your signature style across shots. Pick export sizes appropriate for each platform and set consistent social-sharing settings to keep your look intact.
Sharing presets
Create presets that capture your preferred balance of warmth, clarity, and glow. Label them clearly so you can apply quickly across future night shots.
How to Edit Night Photos in Snapseed Step by Step Using Advanced Tools: final note
If you follow this step-by-step approach—focusing on exposure, color balance, noise control, and selective edits—you’ll consistently produce Night Photos in Snapseed Step by Step Using Advanced Tools that look natural, vibrant, and true to the moment.

Smartphone Night Photography Enthusiast & Founder of IncrivelX
Vinicius Sanches is a passionate smartphone photographer who has spent years proving that you don’t need an expensive camera to capture breathtaking images after dark. Born with a natural curiosity for technology and a deep love for visual storytelling, Vinicius discovered his passion for night photography almost by accident — one evening, standing on a city street, phone in hand, completely mesmerized by the way artificial lights danced across wet pavement.
That moment changed everything.
What started as a personal obsession quickly became a mission. Vinicius realized that millions of people were carrying powerful cameras in their pockets every single day, yet had no idea how to unlock their true potential after the sun went down. Blurry shots, grainy images, and washed-out colors were robbing everyday people of memories and moments that deserved to be captured beautifully.
So he decided to do something about it.
With years of hands-on experience shooting city streets, starry skies, neon-lit alleyways, and creative night portraits — all with nothing but a smartphone — Vinicius built IncrivelX as the resource he wished had existed when he was just starting out. A place with no confusing jargon, no assumptions, and no gatekeeping. Just honest, practical, beginner-friendly guidance that actually gets results.
Vinicius has tested dozens of smartphones from every major brand, explored dark sky locations across multiple states, and spent countless nights experimenting with settings, compositions, and editing techniques so that his readers don’t have to start from scratch. Every article on IncrivelX comes from real experience, real mistakes, and real lessons learned in the field.
When he’s not out shooting at midnight or writing in-depth guides for the IncrivelX community, Vinicius can be found exploring new cities with his phone always within reach, looking for the perfect shot hiding in the shadows.
His philosophy is simple: the best camera is the one you already have — you just need to learn how to use it in the dark.