Smartphone lighting tips for night portraits
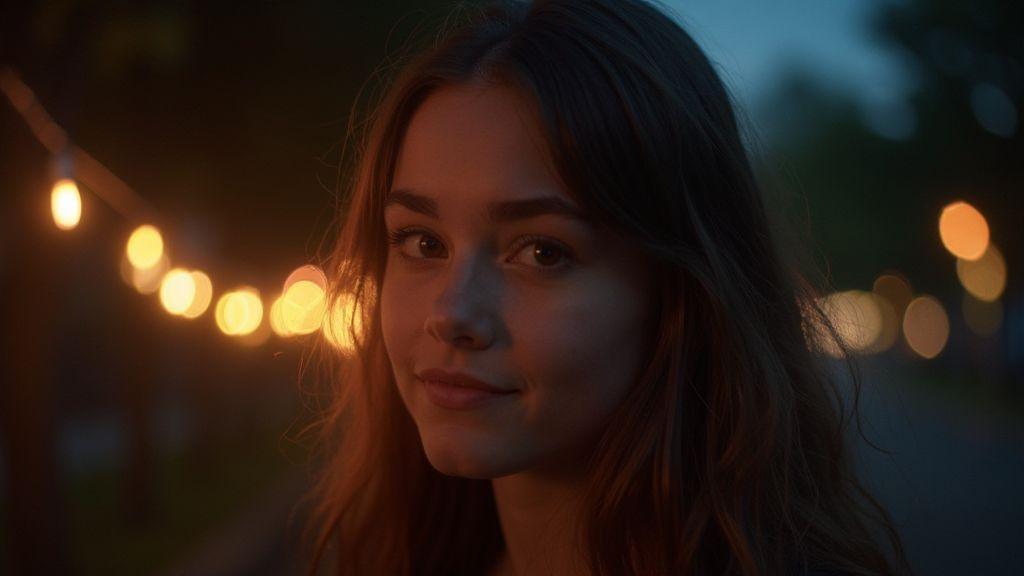
You’re chasing clear, flattering night portraits, and your smartphone can do more than you think. With practical lighting tricks, you’ll turn dim scenes into warm, sharp photos that feel professional. Let’s dive into quick steps you can use tonight. Expect better skin tones, softer shadows, and a more inviting photo overall.
First, your phone’s flash isn’t the boss anymore. By softening light and using smart placements, you can create a natural glow that makes your subject pop. Practice a quick test shot and compare it to direct flash—you’ll feel the difference in real time. The goal is even light, not a bright blob on the face.
With intentional light placement, you gain control without extra gear. That means less editing later and more confident portraits you’ll want to share right away. You can build a simple setup with items you already have: a dim lamp, a colored screen, and your phone at the right angle.
Soften your phone flashlight for even light
When the phone’s flashlight is the only light, it can look harsh. Tilt or bounce the light off a nearby wall, ceiling, or white cardboard to turn the beam into a soft wash across your subject. A small object between you and the light source can diffuse it—napkin, tissue, or paper works well. The aim is to wrap light around faces, not carve sharp lines. The result feels warmer and more natural, like a gentle streetlamp.
Use your screen as a warm fill light
Your screen can be a secret weapon. Turn on a warm, low-brightness screen and angle it toward your subject as a fill light. The glow adds life to eyes and softens shadows without overpowering the scene. If you’re solo, reflect the screen’s light off a nearby surface to widen the fill without hotspots.
Phone positioning for flattering light
Positioning is everything. Hold your phone slightly above eye level and angle down toward the face for a slimming effect and gentle shadows. If you’re dealing with shadows under the nose or chin, a tiny tilt can balance the face. Keep fill light off to the side to avoid washing out details. Small shifts change the mood, so test a couple of angles quickly.
Affordable LED lights for night portraits
You want night portraits that pop without breaking the bank. Start with affordable LED kits that include a couple of compact panels and stands you can carry all night. The goal is soft, even illumination you can shape with quick tweaks, not blinding brightness. Budget LEDs let you experiment with different angles and distances, helping you practice and improve.
Choose compact, dimmable models with solid color quality. High CRI (color rendering index) and stable brightness yield better skin tones and less post-work. A small, reliable kit makes it easier to move around a city street or park at night, especially when paired with a reflector or white wall. Watch battery life and heat; switch batteries between shots and consider quiet power options for discreet shoots.
Choose color temperature and high CRI LEDs
Color temperature matters. For night portraits, aim for warm-to-neutral tones (roughly 3200K–4500K) to flatter skin. High-CRI LEDs render tones more accurately, reducing post-work. Look for a panel with adjustable color temperature and CRI 90. If unsure, white balance checks under the lights and a gray card help. Consistency matters, so pick lights that stay stable when dimmed or color-adjusted.
Color accuracy helps when pairing multiple lights. A main light on one side with a slightly cooler fill on the other adds depth. In tight spaces, use one main source and the other as fill for a natural, cinematic look.
Pick portable battery powered lights for night portraits
Battery-powered lights give you freedom to move between locations. Choose compact panels with long battery life and quick recharge. Easy setup and quick adjustments—brightness, tilt, and angle—keep you shooting without lugging gear. A kit that fits in a small bag lets you place lights behind your subject for rim light or in front for flattering portrait lighting.
Extras to consider: a compact charger, spare batteries, and a light carry case. Portable power means you’re in control, not the venue’s outlets.
Mount and dim LEDs for control
Secure mounting is essential for clean portraits. Use lightweight stands or clamps to position LEDs at the right angle. A dimmer helps you avoid harsh shadows and keeps skin tones gentle. Start with a soft glow, then brighten to reveal eyes or background detail. When using two lights, dim one a touch more for depth and separation. A reliable mount and smooth dimming make your night portraits cinematic, not flat.
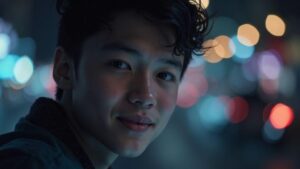
Using streetlights for night portrait lighting
Streetlights can shape mood and texture. Place your subject a few steps from the lamp to avoid harsh features, then tilt the camera to catch glow on cheekbones. Move around for side lighting that adds depth, or back up to use streetlight as rim light to separate subject from background. Keep your camera steady and exposure balanced so the glow stays on the face without muddy backgrounds.
Find flattering angles under streetlights
Stand slightly to the light’s side and tilt the subject’s chin a notch to catch the glow across the face. Higher angles can make eyes sparkle; lower angles add drama by catching the jawline. Angle the subject so the lamp doesn’t hit the lens directly, reducing flare. Experiment with distance to keep the face as the focal point while the background stays soft.
Manage mixed color casts with white balance
Streetlights can tint skin warm or cool. If faces look orange, cool the white balance; if they look blue, warm it. Shooting RAW lets you tweak white balance in post without losing detail. Watch neon signs or storefronts that can cast greens or magentas; adjust WB and, if needed, exposure a touch to preserve the glow on the face.
Use distance to control streetlight brightness
Distance changes how bright the glow appears on the face. Step back if the light blows out features; move in for stronger presence. Vary distance to create a soft halo or a punchier look. Each distance tweak shifts warmth, shadow depth, and mood.
Household light sources for night portraits
You don’t need fancy gear to get great night portraits. Your home can become a studio with everyday lights that craft mood, shape, and color. Arrange lamps, flashlights, and string lights to flatter your subject and add depth. The goal is atmosphere, not just illumination. Try different angles and distances to find what feels right.
Plan a mood—soft, cozy warmth or crisp, dramatic light—and choose lights that match. Diffuse glow from soft sources for flattering skin, or sharper light for contrast. Create a small, controllable space with a clean background and a stable place for your camera. A simple lampshade tilt or fairy lights can transform a portrait.
Safety and stability matter: use safe bulbs, avoid overheating cords, and keep a charged battery and spare light nearby. If something feels off, adjust distance first; small distance changes can dramatically improve mood. Practice and refine your setup to tell a story with light on your terms.
Use lamps, flashlights, and fairy lights safely
Place lamps on stable surfaces and use bulbs that match the warmth you want. Tilt lampshades to aim light where you need it and avoid glare on the lens. Choose steady, non-flickering flashlights and hold them steady. Fairy lights behind or along walls add depth without overpowering the subject. Unplug when you’re done and inspect cords for wear.
Create soft light with diffusion from fabric
Diffuse harsh light with fabric stretched over a frame or chair. A white sheet, scarf, or bedsheet between the light and subject softens shadows and wraps light around features. Move the diffuser closer for intimacy or farther for a broader glow.
Diffuse household lights for a gentle glow
Place the diffuser between the light and subject to soften highlights and boost eye sparkle. Bounce light off a wall or ceiling to spread it further. If the frame is still dark, add another diffused light at a similar distance. Keep diffusion angle and distance consistent across shots.
Off-camera flash alternatives for night portraits
Night portraits don’t require a full studio. Small, portable lights can work as off-camera options when placed and bounced well. The idea is gentle, natural-looking light that shapes features without washing them out.
Use small speedlights or hand-held LEDs as alternatives
Small speedlights are light, quick to set up, and easy to control. Hand-held LEDs offer continuous light you can see as you shoot. Use a diffusion panel, bounce off a wall, or aim slightly upward to soften shadows. Keep power modest for natural skin tones.
Try low-power bursts and bounce instead of direct flash
Low-power bursts allow for exposure without overpowering the subject. Bounce light to fill shadows softly and move around to catch reflections. This approach keeps the scene natural and avoids a studio look. If the backdrop is dark, bouncing helps separation between subject and background.
Sync and trigger basics for reliable flashes
Use a simple off-camera trigger or built-in commander to keep timing solid. In crowded areas, a radio trigger offers steadier results. Keep cables minimal, test beforehand, and use a single channel to avoid cross-talk. A reliable trigger lets you focus on expression and composition.
Reflectors and bounce techniques for night portraits
Reflectors bend light to fill shadows and add a gentle glow. A white foam board or compact reflector can supply warmth or coolness by catching nearby light sources—street lamps, car headlights, or cafe lamps. Position the reflector to brighten eyes and soften shadows.
Angle reflectors to remove harsh shadows
Place the reflector slightly above eye level to avoid flattening features. A shallow angle can soften shadows around the jawline. Move the reflector closer for a stronger fill or farther away for a subtler glow.
Bounce light to create natural catchlights
Bounce light off a surface to brighten the eyes and add a catchlight. A wall, lighted sign, or light-colored shirt can serve as a reflector. If you’re shooting solo, tape the reflector in place to keep hands free. The goal is to guide light around the subject so the eyes stay lively and the skin tone remains even.
DIY lighting for night portrait photography
Shape night portraits with simple, portable gear. Start with a balanced key and ambient mix, using a soft light slightly above and off to one side for natural falloff. A bounce from the ground or wall can fill shadows without killing contrast. The aim is a flexible setup that travels with you, quick to deploy and easy to adjust.
Build a simple LED panel from strips and a diffuser
Cheap LED strips paired with a diffuser create a panel bright enough to stand out from street lights without washing skin tones. Mount above and to the side of the subject and adjust color balance to match ambient light. A foam or clamp mount keeps the panel stable and easy to reposition.
Convert household lamps into soft key lights
A table lamp with a shade can produce a flattering soft key light. Use a diffuser (a white bedsheet or extra shade) to spread glow. Place the lamp off to one side and above the subject, and consider a dimmer for mood control. Stabilize the lamp with tape or clamps to prevent tipping.
Budget stands and safe mounts for DIY gear
Choose lightweight stands with adjustable height and angle. Use cable organizers and tape to manage cords. A strong, compact clamp and a small swivel head let you position lights precisely. Prioritize safety and quick setup for reliable, night-friendly portraits.
Nighttime portrait lighting on a budget
You don’t need pro gear for striking night portraits. Plan the light color, bounce, and subject placement for intentional, affordable results. A steady camera on a tripod and a quiet background let your lighting do the talking. Mix DIY hacks with inexpensive gear to achieve pro vibes.
Compare cheap LEDs, secondhand flashes, and phone hacks
- Cheap LEDs: good color and steady output with diffusion, adjustable brightness, and color temperature.
- Secondhand flashes: more power and faster recycling times; learn manual settings and use bounce to soften.
- Phone hacks: use the phone as a practical light or bounce with a card; stack phones for a makeshift panel. Timing with street glow adds depth.
Rent or borrow gear to try before you buy
Renting lets you test what works for your style without heavy upfront costs. Compare a renter’s kit with your own gear and note what you actually use. Plan what you’ll buy after the session, based on what delivers consistent results.
Plan shots to get pro looks with low cost
Map the light path and mood. Use a key light, a fill, and a background glow. A small reflector can add a subtle glow. Think in layers: subject, light, and background. Keep your camera on manual to control exposure and color temperature to avoid odd skin tones.
Camera settings to work with low light
In low light, balance exposure, noise, and sharpness. Small changes in ISO, shutter, and aperture matter. If handheld, ensure a fast enough shutter to avoid blur; with a tripod, longer exposures are possible. Neon streets push toward cooler tones; quiet parks may need a touch more exposure.
Raise ISO sensibly to balance noise and exposure
Start with the lowest usable ISO. If you’re handholding, you may need higher ISO to keep shutter speeds reasonable. RAW gives more latitude to recover in post, but don’t rely on noise reduction to salvage a poorly exposed shot. Balance ISO with aperture and shutter to keep highlights and shadows readable.
Use slow shutter with stabilization and wide aperture
A slow shutter gathers more light but requires stabilization. A tripod or stable surface lets you push for longer exposures. A wide aperture (f/1.8–f/2.8) helps subject separation and lets you keep ISO lower. Consider depth of field; a gentle background blur often reads more cinematic on a dark street.
Test white balance for mixed light scenes
Experiment with WB presets or a custom setting to keep colors honest in mixed light. Neon might push cooler tones; warm street lamps push warmer tones. Shoot RAW to tweak later if needed. Moderate WB adjustments can prevent color casts from overpowering the mood.
Best Light Sources for Night Portraits Without Professional Equipment
You’ll often rely on what’s around you to illuminate your subject when you’re not using pro lighting. Look for street lamps, car headlights, window light, and reflections off walls. These Best Light Sources for Night Portraits Without Professional Equipment can shape mood and texture as much as a studio setup. You’ll learn to place yourself so light hits your subject just right, creating depth and catching sparkling eye detail without harsh shadows.
In your everyday kit, a bright storefront or a passing car can give you a cinematic edge when you angle your subject into the glow. If you’re patient, you’ll wait for a window of soft light or a gentle street glow that makes your subject pop. You don’t need fancy gear to tell a strong night story—just your eye for how light shapes mood and your willingness to adapt on the street.

Smartphone Night Photography Enthusiast & Founder of IncrivelX
Vinicius Sanches is a passionate smartphone photographer who has spent years proving that you don’t need an expensive camera to capture breathtaking images after dark. Born with a natural curiosity for technology and a deep love for visual storytelling, Vinicius discovered his passion for night photography almost by accident — one evening, standing on a city street, phone in hand, completely mesmerized by the way artificial lights danced across wet pavement.
That moment changed everything.
What started as a personal obsession quickly became a mission. Vinicius realized that millions of people were carrying powerful cameras in their pockets every single day, yet had no idea how to unlock their true potential after the sun went down. Blurry shots, grainy images, and washed-out colors were robbing everyday people of memories and moments that deserved to be captured beautifully.
So he decided to do something about it.
With years of hands-on experience shooting city streets, starry skies, neon-lit alleyways, and creative night portraits — all with nothing but a smartphone — Vinicius built IncrivelX as the resource he wished had existed when he was just starting out. A place with no confusing jargon, no assumptions, and no gatekeeping. Just honest, practical, beginner-friendly guidance that actually gets results.
Vinicius has tested dozens of smartphones from every major brand, explored dark sky locations across multiple states, and spent countless nights experimenting with settings, compositions, and editing techniques so that his readers don’t have to start from scratch. Every article on IncrivelX comes from real experience, real mistakes, and real lessons learned in the field.
When he’s not out shooting at midnight or writing in-depth guides for the IncrivelX community, Vinicius can be found exploring new cities with his phone always within reach, looking for the perfect shot hiding in the shadows.
His philosophy is simple: the best camera is the one you already have — you just need to learn how to use it in the dark.