ProRAW and Night Mode: Unlocking Professional Night Photography on iPhone 17 and Pixel 10
Unlocking professional-looking night shots comes from understanding how ProRAW and Night Mode work together. ProRAW provides a richer data set per pixel for post-edit control, while Night Mode uses smart stacking to brighten scenes naturally. Together, they let you push exposure, contrast, and color after you shoot without looking overprocessed.
How ProRAW and Night Mode work
ProRAW preserves more color and brightness information, giving you latitude to reshape the image in post. Night Mode brightens dark scenes through software, reducing grain and preserving natural detail. When used together, Night Mode handles exposure and noise reduction, while ProRAW keeps the underlying data intact for precise adjustments later.
In practice, Night Mode stacks multiple short frames, aligns them to minimize motion, and blends them to reduce noise. ProRAW data sits alongside, enabling finer control over brightness, shadows, and textures after capture. The result is a night photo that stays true to the scene when zoomed in or edited.
Multi-frame stacking explained
Multi-frame stacking is the backbone of Night Mode. The camera captures several frames in quick succession and blends them to reduce noise and improve dynamic range. Alignment keeps moving subjects in place, while the software favors clean data and fills gaps. More frames yield better noise reduction, but excessive movement can cause softness. Still subjects benefit most, and combining this with ProRAW preserves editable detail.
Why RAW keeps more detail
RAW records sensor data with minimal processing, delivering greater dynamic range and color information for post-editing. ProRAW adds camera-aware color science on top of RAW, preserving detail after exposure and contrast adjustments. RAW lets you recover highlights and pull detail from shadows without making the image look oversmoothed. RAW files are larger and require editing, but they offer substantial latitude for serious night work.
Quick demo shot checklist
- Set up a stable frame with a tripod or solid surface.
- Enable ProRAW and Night Mode for raw data plus multi-frame stacking.
- Frame with a strong light source for punch.
- Check exposure and white balance for natural tones.
- Hold still during the stacking sequence.
- Review shadows and highlights; save a RAW copy for edits.
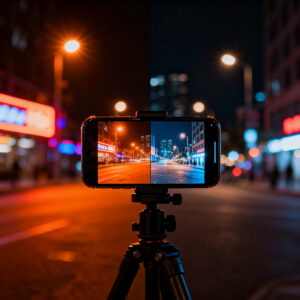
- Compare frames with Night Mode on and off to see the difference.
- Export in a post-edit-friendly format to preserve edits.
iPhone 17 ProRAW tips
Aim for sharper, cleaner night shots. Turn on ProRAW to capture more data, then use Night Mode to brighten scenes while preserving color. A steady hand or haptic feedback helps—tiny shifts matter in low light. If possible, shoot RAW with a slower shutter when feasible, but avoid motion blur by keeping the subject still or using a higher ISO only as a last resort.
Combine Night Mode with ProRAW: Night Mode stacks images for exposure, while ProRAW retains tone and color for post. Expose for bright spots and keep shadows readable. Lock focus on a bright area to stabilize exposure as you reframe. In editing, gently adjust highlights, shadows, and clarity to reveal hidden details. Balance exposure and noise for a natural look.
White balance should remain controlled; start with a warm or neutral setting to prevent color shifts from artificial lighting. Use conservative noise reduction in post—ProRAW gives latitude, not an excuse to over-smooth. Compare multiple frames to select the best one for your scene.
iPhone 17 ProRAW night photography tips (consolidated)
Plan your shot with a steady setup and a mix of bright lights and shadows. Use a low ISO to minimize grain and let Night Mode stack frames for detail. If color casts appear from neon, adjust white balance in post rather than during capture. ProRAW preserves color and texture for post tweaks. Frame with a foreground, middle ground, and background to maximize depth. When possible, use a tripod or a stable surface, and consider burst captures for moving subjects. Subtle color pairing—warm lights against cool night—can enhance mood without oversaturation. Check the histogram to avoid blown highlights or crushed shadows.
Best camera app toggles to try
ProRAW and Night Mode unlock professional night photography on iPhone 17 and Pixel 10, but you can optimize with the right app toggles. In the built-in app, enable ProRAW and switch Night Mode to long exposure when needed. For more control, use apps that expose RAW files with manual sliders for exposure, ISO, and white balance. Look for toggles labeled RAW, ProRAW, or Night, and pair them with manual focus to avoid drift. Practice with a consistent white balance to prevent frame-to-frame color shifts.
Choose a dedicated editor that respects RAW data. Non-destructive editors with separate exposure, contrast, and color controls are ideal. Apply noise reduction sparingly on night shots to avoid flattening detail. Save multiple versions to compare different looks.
Try a tripod for test shots
A tripod dramatically improves night shots by stabilizing longer exposures. Mount your iPhone, shoot a Night Mode sequence with ProRAW, and compare how shutter speeds affect detail and noise. If a tripod isn’t available, rest on a solid surface and use a timer to avoid shake. A small portable tripod becomes a valuable companion for night photography.
Pixel 10 Night Mode guide
Pixel 10 Night Mode brightens exposure, enhances color, and reduces grain. Hold steady and tap the shutter with intention. Night Mode emphasizes longer shutter times and brighter previews; stay still during capture, and the phone will guide you with a countdown. For portraits, Night Mode helps keep faces clear even with longer exposures. Outdoors or in dim rooms, it preserves color fidelity and prevents over-brightening.
Pixel 10 Night Mode low light guide
Low light with Night Mode aims for balance: enough light to reveal detail without a chalky glow. Frame subjects against lighter backgrounds to aid exposure, and keep the camera as still as possible. Minimize backlighting to reduce halos and color shifts. Night Mode reduces noise and preserves color, delivering crisper textures on surfaces. If blur occurs, hold still longer or use a timer. Compare shots to ensure color accuracy and noise performance.
When to use Night Mode versus auto
Use Night Mode when the scene is clearly dark or the subject is dim. Auto can suffice in light-poor situations, but Night Mode provides better shadow detail and color accuracy in low light. If you want clearer eyes, visible texture, and true colors in the dark, Night Mode is your go-to.
Hold still and use a timer
Hold your phone steady and use a timer to avoid camera shake during longer exposures. A 2–3 second delay helps you avoid pressing the shutter while moving. If subjects move, opt for shorter exposures and a quick burst to capture the sharpest frame. A stable stance or a small tripod improves results with minimal effort.
ProRAW vs Pixel RAW comparison
ProRAW on iPhone and Pixel RAW on Pixel offer distinct advantages. ProRAW provides raw data plus camera processing for flexible white balance, exposure, and color. Pixel RAW captures raw data with minimal camera edits, offering a closer starting point to the sensor’s view. ProRAW often yields more latitude in bright areas; Pixel RAW tends toward a faithful baseline.
File sizes are large for both, and workflow matters. ProRAW integrates well with Apple software; Pixel RAW with Google tools and common editors. Both give you flexibility, but your end look will reflect your editing style.
ProRAW vs Pixel RAW night mode comparison
In night mode, ProRAW captures more raw data for dramatic edits, while Pixel RAW aims for cleaner, more natural results with fewer surprises after editing. ProRAW night mode can deliver richer color and contrast; Pixel RAW night mode tends to be steadier out of camera. Your choice depends on whether you want cinematic drama or faithful night tones, plus how you edit (Apple vs Google ecosystems).
Strengths of RAW plus computation
RAW plus computation combines unprocessed data with smart stacking, noise reduction, and detail preservation. You gain the ability to recover shadows, control highlights, and craft a cleaner night scene while retaining texture. The result is a finished-looking photo rather than a rough raw file, with flexibility to push exposure and color after the shot.
If you shoot urban scenes with bright signs and dark alleys or use a tripod, you’ll see even greater benefits from stacking. You’re in control of the final look, with computation aiding noise suppression and color stability.
Quick side-by-side test
When comparing ProRAW Night Mode and Pixel RAW Night Mode, note differences in shadow detail, highlight handling, and color punch. ProRAW often shows bolder color and contrast; Pixel RAW tends to render a steadier baseline with less aggressive edits needed. Use a consistent ISO, tripod, and scene to assess how each mode handles noise, texture, and light balance.
Best settings for sharp night shots
- Use a tripod or stable surface; give the camera a moment to settle.
- Favor longer exposure with controlled ISO to reduce noise.
- Lock white balance to a neutral or warm setting to avoid color shifts.
- Frame with careful composition and test different exposure times.
- Post-process with restrained sharpening and noise reduction for natural results.
Best settings ProRAW Night Mode iPhone 17
Enable ProRAW and Night Mode on the iPhone 17. Allow Night Mode to set exposure automatically, but intervene if highlights blow out. Use a steady frame, longer exposure when needed, and a careful balance of highlights and shadows in post to preserve detail. ProRAW gives you the data to refine color, texture, and exposure after capture.
ISO, exposure, and focus tips
- Start with a low ISO; increase only if needed to reveal detail.
- Favor slightly longer exposures to preserve color and reduce grain.
- Use focus peaking or tap-to-focus on a clearly lit object; lock focus when framing.
- For static scenes, manual focus can yield the sharpest results.
Handheld night shot techniques
- Adopt a stable stance: feet shoulder-width apart, elbows in.
- Use short bursts to reduce motion blur; pick the sharpest frame.
- Lean against a wall or railing for extra stability.
- Practice breathing to minimize camera shake.
Handheld night shots Pixel 10 Night Mode tips
Steady the grip and choose non-moving subjects when possible. If motion occurs, adjust stance or use a stable surface. Keep camera calm during stacking and avoid jostling the phone while the stack runs. Use a slower, more deliberate shutter and frame to maintain color fidelity and detail.
Use body brace and short bursts
A tight body brace reduces shake. Quick bursts of shutter presses often yield sharper results than holding down for a long time. Choose the sharpest frame from your burst for the final image.
Steady hand breathing trick
Take a calm breath, exhale halfway, then press the shutter. A steady exhale helps you avoid tremor at the moment of capture.
Long exposure and Night Mode
Long exposure plus Night Mode lets you capture light trails and star-like details. Night Mode stacks frames for brightness without clipping highlights. Practice with different scenes to understand when to rely on Night Mode versus standard capture. If motion is present, shorter exposures may be preferable.
Pixel 10 long exposure Night Mode tutorial
In Pixel 10, switch to Night Mode and use the exposure slider if available. Hold steady, then press to stack frames. For moving subjects, use shorter exposure to keep detail. For light trails, choose longer exposure and be patient as lights move through the frame. If you want ultra-clean results, blend in ProRAW after stacking and tweak in editing.
When to use long exposure for light trails
Use long exposure to emphasize motion, such as vehicles or stars, for dramatic trails. It’s ideal for static scenes with moving lights but may blur people. Shorter exposures preserve detail for moving subjects.
Use a stable surface or tripod
Start with a stable surface or tripod for longer stacks. If you don’t have one, prop the phone on a solid edge and use a small delay timer to reduce shake. A steady setup helps you push for longer exposures without blur.
Edit ProRAW night photos
Treat ProRAW like a high-capacity raw file: you have room to adjust exposure, color, and noise without losing detail. Open in your editor and shape the scene to your taste. Lightroom Mobile is a great option for ProRAW edits, offering real-time previews and non-destructive adjustments.
Editing ProRAW night photos in Lightroom Mobile
- Start with Exposure to set brightness, then refine with Contrast.
- Tweak Highlights and Shadows to protect bright points and reveal dark corners.
- Balance White Balance to suit the lighting, then adjust Detail for noise and texture.
- Use Color, HSL, and Calibration to correct color casts from mixed lighting.
- Apply selective masking to local areas needing adjustments.
- Save presets for future night shoots.
Basic edits: exposure, noise, color
- Adjust exposure to brighten the scene without clipping highlights.
- Use moderate noise reduction; preserve edge sharpness with selective sharpening.
- Fine-tune color with Temperature, Tint, and HSL controls for realistic night hues.
Export and noise control
Export ProRAW edits as high-quality DNG or JPEG. For maximum editability, choose DNG; for quick sharing, use a high-quality JPEG. Use color profiles suitable for your workflow (sRGB for web, Adobe RGB for print) and label files clearly. Consider exporting alternate versions for comparison.
Noise control and astrophotography
Noise control is central to clean night shots. Longer, steady stacks with low ISO reduce grain and preserve star detail. Learn where noise hides—in shadows and low-light areas—and target those spots with careful exposure and stacking.
Noise reduction techniques: ProRAW Night Mode photos
- Start with Night Mode to maximize light capture; use ProRAW for color and brightness detail.
- Stack multiple frames to average out noise; longer exposures with incremental stacking can reduce noise more effectively than a single long exposure.
- Use targeted noise reduction in post to preserve star sharpness and avoid over-smoothing the sky.
- Shoot RAW with a low ISO and brighten in post for precise control over highlights and shadows.
- Choose color profiles that keep night hues natural and avoid oversaturation.
Astrophotography: iPhone 17 ProRAW Night Mode tips
- Use a sturdy setup (tripod or solid surface) for long stacks.
- Night Mode balances exposure to keep stars from washing out; adjust stacking length and ISO accordingly.
- Stack several frames to reduce noise; tweak white balance after stacking for natural skies.
- Experiment with focal lengths to keep Milky Way visible without distortion.
- Compare results across processing steps to maintain star trails and overall clarity.
Final note
ProRAW and Night Mode combine to deliver professional-grade night photography on iPhone 17 and Pixel 10. By leveraging RAW data and intelligent stacking, you gain control over exposure, color, and texture while minimizing noise and motion artifacts. With practice, your night shots can rival those from dedicated cameras, all while staying in your pocket.

Smartphone Night Photography Enthusiast & Founder of IncrivelX
Vinicius Sanches is a passionate smartphone photographer who has spent years proving that you don’t need an expensive camera to capture breathtaking images after dark. Born with a natural curiosity for technology and a deep love for visual storytelling, Vinicius discovered his passion for night photography almost by accident — one evening, standing on a city street, phone in hand, completely mesmerized by the way artificial lights danced across wet pavement.
That moment changed everything.
What started as a personal obsession quickly became a mission. Vinicius realized that millions of people were carrying powerful cameras in their pockets every single day, yet had no idea how to unlock their true potential after the sun went down. Blurry shots, grainy images, and washed-out colors were robbing everyday people of memories and moments that deserved to be captured beautifully.
So he decided to do something about it.
With years of hands-on experience shooting city streets, starry skies, neon-lit alleyways, and creative night portraits — all with nothing but a smartphone — Vinicius built IncrivelX as the resource he wished had existed when he was just starting out. A place with no confusing jargon, no assumptions, and no gatekeeping. Just honest, practical, beginner-friendly guidance that actually gets results.
Vinicius has tested dozens of smartphones from every major brand, explored dark sky locations across multiple states, and spent countless nights experimenting with settings, compositions, and editing techniques so that his readers don’t have to start from scratch. Every article on IncrivelX comes from real experience, real mistakes, and real lessons learned in the field.
When he’s not out shooting at midnight or writing in-depth guides for the IncrivelX community, Vinicius can be found exploring new cities with his phone always within reach, looking for the perfect shot hiding in the shadows.
His philosophy is simple: the best camera is the one you already have — you just need to learn how to use it in the dark.