How your phone sensor captures light
Your phone camera works like a tiny landlord for light. Each moment you snap a night shot, the sensor collects photons and turns them into a digital image. You’ll notice colors, brightness, and detail come together in a way your eyes can’t match in the dark. The goal is to translate faint light into a clean picture without noise or blur, and that starts with understanding the core parts of the sensor.
When you look at night photos, you’re seeing how the sensor handles what it sees. The sensor’s job is to capture light efficiently, then send that information to your processor to render a view that feels natural. In low light, the sensor has to work smarter, not louder, to avoid grain and blur. This is where size, pixel density, and sensitivity all play their roles in shaping your final image.
Understanding these pieces helps you take better night shots. You can choose a phone with the right sensor setup, tweak settings, and know what to expect when the lights go down. The more you learn about how your sensor behaves, the more you’ll trust your phone to deliver a usable picture even in near-dark conditions.
Sensor size and pixel size
Your phone’s sensor is a small stage where light performs. A bigger stage (sensor) can collect more light, which helps your photos stay bright without cranking up the ISO or adding noise. Bigger pixel sizes on the sensor mean each pixel can grab more photons, so you get clearer colors and less grain in low light. If you compare two phones, a larger sensor with the same megapixel count usually means better night performance.
But you don’t win by size alone. If a phone packs many tiny pixels on a small sensor, those pixels can struggle to gather light, resulting in noisier shadows and muddy colors. In practice, phones with larger sensors and well-optimized pixel sizes give crisper night shots with textures in shadows that don’t feel mushy or flat.
Real-world example: a 1/1.7″ sensor can produce brighter night images than a model with more megapixels but a tiny sensor. The trick is balancing sensor area with efficient color filters and processing. Your camera app may also adjust how it uses the sensor, especially in tricky lighting, to squeeze out the best result without blowing highlights.
Camera sensor sensitivity in low light
Low light sensitivity is about how well the sensor reacts when there isn’t much light. This involves ISO, exposure time, and sensor design. A sensor that handles low light well will produce brighter images with fewer artifacts, even indoors or at dusk.
Practically, good low-light sensitivity comes from larger pixels and smart processing to gather more light per pixel, plus longer exposure times when the scene is stable. If you push for fast shutter speeds in dim rooms, you’ll see darker images or more noise. Noise reduction, color science, and dynamic range all help keep the night looking natural.
Sensor sensitivity explained
Think of sensor sensitivity as how loudly the camera can listen in a dark room. Higher sensitivity means more light capture but more potential noise if pushed too far. Phones balance this with processing tricks and sensor design, aiming to preserve highlights while pulling out shadows.
Phones with better sensitivity produce cleaner shadows and more accurate colors at the same light level. They often combine larger pixels with advanced noise reduction and smart multi-frame blends to retain texture in night scenes. Computational features—like stacking multiple shots—help reduce grain while preserving detail.
How night mode makes the scene brighter
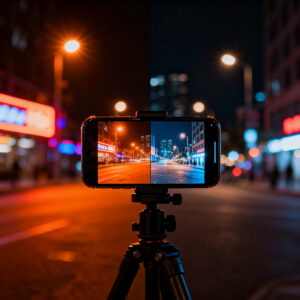
When you switch to night mode, the camera stays open longer to collect more light, making the image brighter than a standard shot. You’ll see more detail in shadows and less noise in dark areas, like turning on a soft lamp inside the frame. Night mode also adjusts color balance so whites don’t look too orange or blue, delivering a more natural look under streetlights or moonlight.
Processing helps clean up the image after capture by blending several moments to reduce blur from tiny hand movements. The result is a brighter photo that still looks sharp and real, especially when you zoom in.
Computational photography night mode
Computational photography near night mode uses real-time analysis of light, motion, and color to decide how long to keep the shutter open and how to blend multiple frames. This increases light without overexposing bright spots.
The software reduces noise by cross-checking pixels across frames, smoothing textures and preserving important details. You’ll notice cleaner skies, crisper brick textures, and more visible faces in low light. It’s like having a built-in editor that enhances the shot as you capture it.
Color science keeps skin tones natural and prevents colors from leaning too far toward blue or orange. This makes night shots more enjoyable to view later.
Multi-frame stacking basics
Multi-frame stacking is the core trick behind night mode. Your camera takes several short, steady frames, aligns them, and stacks them into a single image with more light than a single shot could gather. This cancels random noise and preserves texture, especially in dark corners and skies.
The final image is sharpened and tone-mapped for a natural look, avoiding over-processing. You get a brighter scene that still feels real, not artificially enhanced.
How your phone compares to your eyes at night
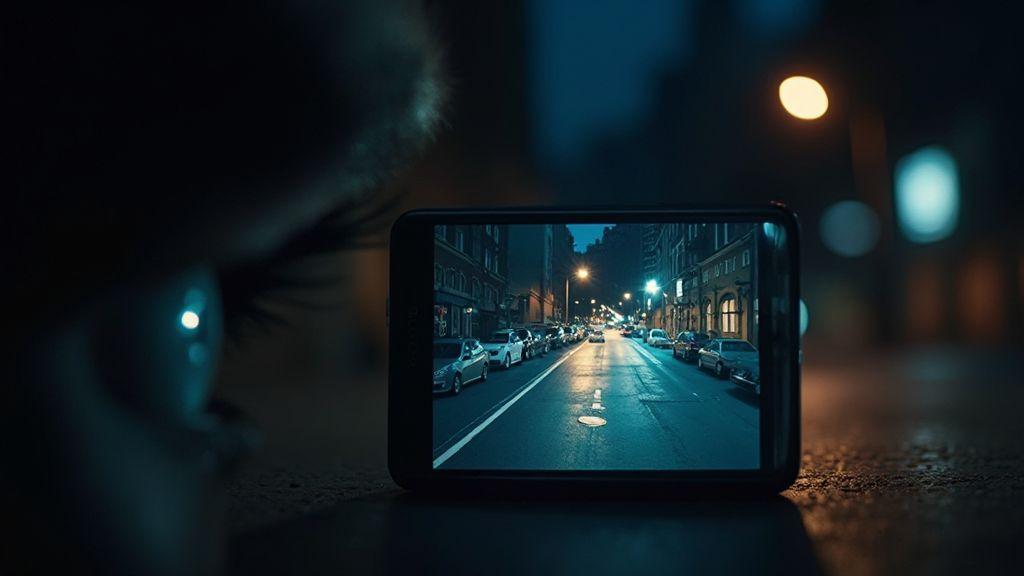
You might be surprised, but your phone can see better in the dark in many situations. It uses sensors and math to boost light, contrast, and detail, revealing things your eyes miss in dim environments. The result is clearer pictures even with little light, helping you capture moments you might overlook.
Eyes have limits: pupils dilate and information is processed in real time, but colors fade and detail blurs in low light. Your phone, by contrast, can combine multiple frames, reduce noise, and push brightness without overwhelming glare. This collaboration between camera software and hardware lets you see more than you would with naked eyes.
When you compare what’s on the screen to what you see with your eyes, you’ll notice two things: brightness and detail. Your eyes rely on real-time signals, while your phone stitches data from several moments. Night modes often look better on the display than real life because of processing—designed to help you decide if a corner is safe or if someone is there in the shadows.
Rods and cones vs pixels
Your eyes use rods and cones to sense light and color. In low light, rods lead, but colors fade and you see fewer shades. Your phone uses pixels and sensors to interpret light, capturing color, brightness, and texture more consistently, even when it’s dark. Stacking frames fills gaps and reduces noise, resulting in a crisper image with details you might miss with naked eyes.
Human vision limits
In the dark, your eyes lose color and detail. They can’t stack light or process hundreds of frames instantly. Your phone compensates with clever tech, giving you clarity, instant feedback, and a way to see what hides in shadows.
How multi-frame noise reduction cleans images
Low-light captures use several tricks to clean up the picture. Multi-frame noise reduction stacks multiple shots to reduce grain and dark specks, yielding a cleaner, more natural look without cranking ISO. It’s like a tiny lab: frames are aligned and blended to keep the subject sharp while dulling noise. The result is a night photo that feels closer to what you saw.
Multi-frame noise reduction night
Your phone uses several frames to reduce noise in low light. Each frame captures tiny amounts of light and is blended to smooth grain. This helps in night scenes with uniform dark areas and subtle textures, though moving subjects can cause slight blur or ghosting.
The payoff: simpler photography at night. You don’t need extreme contrast or ISO; the phone does the heavy lifting so you can shoot freely and still share sharp photos.
Frame alignment and stacking
Frame alignment lines up what the camera saw in each shot. If alignment is off, halos or soft edges appear. Proper alignment keeps edges crisp and textures intact, especially around lights and architectural details.
Stacking combines aligned frames, with each pixel contributing to the final value. The result is smoother tones and more visible textures in shadows. Stability helps the extra information from multiple frames pay off.
If you want better results, keep the camera steady—brace against a wall or place it on a solid surface. The software does the heavy lifting, but steadiness helps it perform even better.
Noise reduction steps
The process: capture several frames, align them, stack to blend, then apply refined noise reduction. The final step fine-tunes color and brightness to avoid over-smoothing, giving natural-looking images with reduced grain and preserved detail.
How aperture and pixel size help low light
You’ll notice night photos look clearer when you understand how aperture and pixel size work. In dark scenes, you want more light to hit the sensor, and these two factors are the main levers. The goal is brightness without blowing out highlights or introducing noise. Think of aperture and pixel size as brakes and gears for smooth travel in low light.
Larger aperture lets in more light
A wider lens opening lets in more photons, producing brighter pictures in dim rooms. It also allows faster shutter speeds, reducing blur from small hand tremors. In practice, switch to night mode and use the widest practical aperture your phone allows.
A wider aperture affects depth of field too. For night portraits, you can blur the background to emphasize the subject. Balance is key: a large opening for brightness, then adjust focus to keep faces sharp.
Bigger pixels reduce noise
Larger pixels gather more light per dot, lowering grain in dark photos. Less noise keeps colors truer and edges cleaner. In dim settings, bigger pixels are your friend because they prevent extreme ISO. You’ll notice more detail in shadows and fewer speckles across skin tones or fabrics. When choosing between models, favor larger pixel pitch for crisper night photos.
What captures light
Light travels from the scene to the sensor through the lens. The sensor’s tiny photosites convert it to a digital signal. Bigger photosites plus a wider aperture mean a brighter, cleaner photo. For the best night shots, seek cameras that optimize both a lens with a wide opening and a sensor with bigger pixels.
Why Your Phone Sees Better Than Your Eyes in the Dark
Why Your Phone Sees Better Than Your Eyes in the Dark is often true in dim rooms. A larger aperture and bigger pixels help the camera capture brightness you miss in real time. Night modes and longer exposure tricks, combined with efficient processing, mean your phone squeezes more light from the night than your eyes can.
To test it practically, compare a candle scene on your phone to your naked eye. The camera usually captures warmer colors and subtle details your brain might overlook. This difference is due to the bigger aperture and larger pixels enhancing light intake.
How image processing boosts night shots
Image processing is the real game changer. It produces cleaner colors, less noise, and sharper edges, even when streetlights blur. Post-capture adjustments blend multiple frames, correct color casts, and recover shadow detail, making photos feel closer to what you actually saw.
The ISP (image signal processor) coordinates sensors, lenses, and the processor in real time, enabling handheld night shooting with reduced blur. It aligns colors, tones, and sharpness so your photo reads clean and natural. If you’ve noticed a surge of clarity in night mode, you’ve felt the ISP at work.
Image signal processing in low light
Signal processing quiets noise, sharpens edges, and adjusts exposure thoughtfully. Stacking multiple quick shots brightens the scene without blowing out highlights, helping recover shadow detail. Color science preserves skin tones and mood, producing photos that feel true to life rather than over-processed.
HDR and dynamic range in low-light photography
HDR in low light blends shots at different exposures to reveal both bright and dark areas. You’ll see texture in brick, definition in faces, and atmosphere across the frame. Dynamic range work lets a glowing lamp and a dark alley coexist in one shot. Be mindful: too many bright points can tip HDR toward a glossy look.
ISP role at night
The ISP acts as the night guard for photos. It handles noise reduction, color calibration, and detail preservation in real time, enabling you to shoot handheld at night with less blur. Think of it as the conductor of a camera orchestra, keeping sensors, lenses, and processing in harmony.
How high ISO and exposure tricks work
You can pull more light from a dark scene by tuning ISO and exposure. Higher ISO amplifies the sensor signal, brightening colors and details but adding grain. Longer exposure captures more light but requires stability to avoid blur. The trade-off is brightness versus clarity.
If you push ISO too far, shadows become grainy and colors shift. Some phones automatically apply noise reduction at high ISO, which can soften fine details. A practical approach is to test incrementally: start at a moderate ISO, then adjust, and use exposure compensation to nudge brightness without sacrificing too much detail.
High ISO phone cameras
Raising ISO reveals more light in dim scenes, like distant windows or faces in a dark street. The downside is texture loss and color shifts in very dark areas. If available, enable noise reduction for night shots but be mindful of potential softening of fine details. Some devices handle high ISO with less grain, yielding crisper highlights and richer color in neon signs. For portraits, prioritize skin tones to keep faces from looking muddy as ISO climbs.
Long exposure with stabilization
Long exposure gathers light over time, revealing more detail in darkness. With a steady hand or a tripod, you can shoot for a few seconds to several seconds to capture trails, water, or city lights. Stabilization helps, but movement still blurs a long exposure. A common approach is to start with a short exposure at mid ISO, then try longer times if the scene isn’t moving.
If motion is frequent, prefer shorter exposures or a tripod to keep lines clean. After shooting, review on a bright display to ensure exposure and movement balance fit your goal.
How infrared and night vision features add detail
Infrared (IR) and night vision use light your eye can’t see to reveal more detail. IR data captures heat signatures and near-infrared light as contrast, outlining edges, textures, and shapes that would stay hidden in visible light. IR can also stabilize a shot, reducing some grain and blur in near-total darkness.
However, color information is limited in IR mode, so you’ll see more grayscale tones and thermal highlights. Use IR selectively when depth and clarity are more important than color.
Infrared night vision phones
Infrared night vision reveals heat signatures and textures, highlighting warmer objects as brighter spots. It’s useful for locating people, animals, or cameras in the dark, especially in spaces with scarce visible light.
IR works best with contrast; uniform temperatures yield subtler differences. Color information is limited, so expect grayscale and thermal contrasts rather than vivid hues.
When sensors detect IR light
IR sensing maps heat or near-infrared to brightness values, producing an image your eyes struggle to form in the dark. You’ll see glow or bright patches that help with distance and placement, aiding planning and safety in dim environments.
Use IR for corner checks, movement tracking, or confirming presence in a dark area. The moment the sensor detects IR, brightness shifts to emphasize heat or reflected IR light.
IR night vision facts
IR night vision can reveal textures your eyes miss but won’t replace color. It improves edge recognition and helps with composition. Some phones switch between IR and standard modes automatically with lighting shifts; use IR when you need depth and clarity over color.
How to get better low-light photos with your phone
This guide offers practical steps to grab sharper, brighter images in the dark. Start with built-in night modes and exposure controls, then add a tripod when possible. Practice to learn how your device reacts in different lighting and distances, and use quick tricks to keep shots clean and recognizable.
Practice matters—the more you shoot in dim light, the better you’ll become at choosing the right settings quickly. It’s like adjusting to a new pair of glasses: you’ll spot details you missed before, and your photos will feel more like you in the dark.
Phone night mode camera tips
Night mode helps your camera collect more light, but you still control the result. Turn on night mode when suggested, and keep the phone steady to avoid blur. Use exposure lock to prevent shifts when the scene changes. If lights are bright, lower exposure slightly to preserve colors. A timer helps avoid shake.
Every phone handles night mode differently. If grain appears, lower ISO and give the shot more time. For moving subjects, a faster shutter helps but reduces brightness. Practice with indoor lamps and streetlights to learn how your device reacts across tones and distances.
Improve smartphone low-light performance with a tripod
A tripod provides a stable base for longer exposures, reducing blur. A small portable tripod can frame scenes with people, while a flexible one can grip rails or tables for unique angles. If you don’t have a tripod, brace your phone on a solid surface and use a timer to avoid shake. Stability lets your sensor collect more light with less motion blur.
Quick low-light tips
- Stabilize your phone on a solid surface and use the timer.
- Use night mode when available, but experiment with manual exposure tweaks.
- Keep subjects still: ask people to pause or lean on a surface.
- Frame with contrast: position bright spots behind silhouettes for depth.
- Watch white balance: adjust for cooler or warmer tones to keep colors natural.

Smartphone Night Photography Enthusiast & Founder of IncrivelX
Vinicius Sanches is a passionate smartphone photographer who has spent years proving that you don’t need an expensive camera to capture breathtaking images after dark. Born with a natural curiosity for technology and a deep love for visual storytelling, Vinicius discovered his passion for night photography almost by accident — one evening, standing on a city street, phone in hand, completely mesmerized by the way artificial lights danced across wet pavement.
That moment changed everything.
What started as a personal obsession quickly became a mission. Vinicius realized that millions of people were carrying powerful cameras in their pockets every single day, yet had no idea how to unlock their true potential after the sun went down. Blurry shots, grainy images, and washed-out colors were robbing everyday people of memories and moments that deserved to be captured beautifully.
So he decided to do something about it.
With years of hands-on experience shooting city streets, starry skies, neon-lit alleyways, and creative night portraits — all with nothing but a smartphone — Vinicius built IncrivelX as the resource he wished had existed when he was just starting out. A place with no confusing jargon, no assumptions, and no gatekeeping. Just honest, practical, beginner-friendly guidance that actually gets results.
Vinicius has tested dozens of smartphones from every major brand, explored dark sky locations across multiple states, and spent countless nights experimenting with settings, compositions, and editing techniques so that his readers don’t have to start from scratch. Every article on IncrivelX comes from real experience, real mistakes, and real lessons learned in the field.
When he’s not out shooting at midnight or writing in-depth guides for the IncrivelX community, Vinicius can be found exploring new cities with his phone always within reach, looking for the perfect shot hiding in the shadows.
His philosophy is simple: the best camera is the one you already have — you just need to learn how to use it in the dark.